Acupressure for Tech Neck: Pressure Points That Release Neck and Shoulder Tension From Screen Time (2026)
If you spend hours looking at a screen every day, you probably already know the feeling. That deep ache at the base of your skull, the knots forming between your shoulder blades, the stiffness that turns your neck into a rusted hinge. Tech neck is not just a trendy term â it is a real postural problem caused by the forward head position we adopt every time we look at our phones, laptops, and tablets. And it is getting worse as screen time increases across every age group.
I have been working with acupressure since 2017, and neck and shoulder tension from screen use is one of the most common complaints I encounter. It is also one of the areas where acupressure produces the most immediate, tangible relief. The specific pressure points that address tech neck target both the muscular tension itself and the underlying nerve compression patterns that cause the pain, headaches, and restricted range of motion that come with chronic forward head posture.
This guide covers the exact pressure points that release tech neck tension, how to use them for both immediate relief and long-term correction, and how to build a daily protocol that prevents the pain from returning.
What Tech Neck Actually Does to Your Body
Tech neck is not just a sore neck. When your head shifts forward from its natural position over your spine, the weight your neck muscles must support increases dramatically. Your head weighs roughly 10 to 12 pounds in neutral position. At a 15-degree forward tilt â the angle most people hold when looking at a phone â the effective weight on your cervical spine increases to about 27 pounds. At 45 degrees, it reaches 49 pounds. At 60 degrees, your neck muscles are supporting the equivalent of 60 pounds.
This chronic overloading creates a cascade of problems. The muscles at the back of the neck â the suboccipital muscles, upper trapezius, and levator scapulae â become chronically contracted and develop trigger points. The muscles in the front of the neck weaken and lengthen. The pectoralis muscles tighten, pulling the shoulders forward. The thoracic spine rounds. Over time, this pattern becomes structural, and the pain radiates from the neck into the shoulders, upper back, and head.
In Chinese medicine terms, tech neck creates severe qi and blood stagnation in the Gallbladder, Bladder, and Small Intestine meridians that run through the neck and shoulders. The stagnation causes pain, restricts energy flow to the head, and can produce headaches, eye strain, brain fog, and even dizziness. The pressure points selected for this protocol specifically address these meridian blockages while simultaneously releasing the muscular tension patterns that drive the condition.
The Best Pressure Points for Tech Neck
Gallbladder 20 (Fengchi) â The Master Neck Release Point
Located at the base of the skull, in the hollow between the two large neck muscles where they attach to the skull. You will find two depressions on either side of the spine, just below the occipital bone. This is the single most important pressure point for neck and shoulder pain and the one you should learn first if tech neck is your primary issue.
Gallbladder 20 is called “Wind Pool” in Chinese medicine because it is where pathogenic wind enters and lodges in the body, causing stiffness, headaches, and neck pain. From a Western perspective, this point sits directly over the suboccipital muscles â the deep muscles that connect the skull to the first two cervical vertebrae and are the primary muscles that become chronically contracted in forward head posture. Pressing this point releases the suboccipital tension that drives the majority of tech neck symptoms, including the tension headaches that radiate from the back of the head to the temples and behind the eyes.
Research has demonstrated that stimulating Gallbladder 20 reduces cervical muscle tension, improves blood flow to the head and neck, and decreases headache frequency and intensity. It also has documented effects on eye strain and visual fatigue â symptoms that are inseparable from tech neck for most people.
Press with your thumbs angled slightly upward toward the center of the skull, applying firm pressure for 1 to 2 minutes on each side. Many people find that slowly rotating the pressure in small circles is more effective than sustained static pressure at this point. During the release, you may feel the tension dissolving and a warm sensation spreading through the back of the head â this is the qi and blood flow being restored.
Bladder 10 (Tianzhu) â The Heavenly Pillar
Located about half an inch below the base of the skull, on the thick ropey muscles on either side of the spine (the upper trapezius where it meets the neck). Bladder 10 sits slightly lower and more laterally than Gallbladder 20, and the two points work together as a powerful pair for neck tension.
The name “Heavenly Pillar” refers to the cervical spine itself â the pillar that supports the head. This point addresses the stiffness and pain in the upper cervical region that makes turning your head difficult. It also treats the heavy, tired feeling in the head that comes from hours of screen time, the kind of pressure that makes your head feel like it weighs twice as much as it should.
Bladder 10 specifically treats the tension headaches that originate at the base of the skull and radiate upward. It also improves blood flow to the brain, which helps with the mental fatigue and difficulty concentrating that accompany chronic tech neck. Many people who complain of brain fog after long work sessions find that releasing this point produces an immediate improvement in mental clarity.
Press firmly with your thumbs for 1 to 2 minutes. Tilt your head slightly back to expose the point more fully. You should feel a deep, satisfying ache that radiates into the head â this means you are on the right spot.
Gallbladder 21 (Jianjing) â The Shoulder Tension Point
Located at the highest point of the shoulder, midway between the base of the neck and the tip of the shoulder, in the thick trapezius muscle. This is where most people carry their stress, and it is the point that tightens first when you adopt the forward-leaning screen posture.
Gallbladder 21 is called “Shoulder Well” and it is the primary point for releasing the upper trapezius muscle â the muscle that becomes chronically shortened and knotted in tech neck. When this muscle is tight, it pulls on the base of the skull and creates the classic tech neck headache pattern. It also restricts shoulder movement and contributes to the rounded shoulder posture that develops with prolonged screen use.
This point is also a powerful descending point â it moves qi downward from the head and neck, which relieves the sensation of pressure and congestion in the upper body that builds up during long screen sessions. If you ever finish a long work day feeling like your head is going to explode and your shoulders are cemented to your ears, Gallbladder 21 is the point that addresses this directly.
Press firmly with your opposite hand, squeezing the trapezius muscle between your fingers and thumb. Hold for 1 to 2 minutes on each side. You can also use a gentle kneading motion. Pregnant women should avoid strong stimulation of this point. The release often produces an immediate sensation of the shoulders dropping â many people do not realize how high they have been holding their shoulders until this point releases.
Small Intestine 3 (Houxi) â The Spine Realignment Point
Located on the side of the hand, in the depression just behind the knuckle of the little finger when a loose fist is made. This point is easy to miss because it is on the hand rather than the neck, but it is one of the most important points for tech neck because of its effect on the entire spine.
Small Intestine 3 is called “Back Stream” and it is one of the eight confluent points â special acupressure points that connect to the extraordinary vessels. This point opens the Governor Vessel (Du Mai), which runs up the entire spine and over the head. In practical terms, pressing this point directly benefits the cervical and thoracic spine, releasing the tension pattern that runs from the lower back through the upper back, neck, and into the skull.
For tech neck specifically, this is the point that addresses the structural component â the thoracic kyphosis and cervical misalignment that develops with chronic forward head posture. It helps restore the natural curvature of the spine and releases tension along the entire posterior chain, not just the neck itself. It also treats the upper back pain between the shoulder blades that accompanies tech neck in most people.
Press firmly into the depression with your thumb for 1 to 2 minutes on each hand. This point responds well to strong pressure. You can press it discreetly during meetings or while working â making a loose fist and pressing the point against the edge of a desk works effectively.
Governor Vessel 16 (Fengfu) â The Wind Mansion
Located at the center of the back of the head, in the depression directly below the occipital bone, between the two Gallbladder 20 points. Governor Vessel 16 sits right at the junction between the skull and the cervical spine â exactly where tech neck creates the most severe compression.
The name “Wind Mansion” indicates that this is a critical point for conditions caused by wind entering the body through the neck â which in modern terms translates to drafts, air conditioning exposure, and the cold stiffness that develops when you sit in one position too long. If you have ever noticed your tech neck is worse in air-conditioned offices, this is the point that addresses that component directly.
Governor Vessel 16 clears the head, benefits the brain, and relaxes the sinews of the neck. It is particularly effective for the severe headaches that originate at the exact junction between the skull and neck â the type that feels like someone is driving a spike into the base of your skull. It also treats dizziness and the visual disturbances that can accompany severe tech neck.
Press with one or two fingers, using moderate to firm pressure for 1 to 2 minutes. This point is on the midline, so you only need to press it once rather than bilaterally. Some people experience a strong sensation radiating up into the head â this is normal and indicates that the qi stagnation is being released.
Large Intestine 4 (Hegu) â The Pain Release Point
Located in the web of flesh between the thumb and index finger, at the highest point of the muscle when the thumb and finger are brought together. Large Intestine 4 is the most commonly used acupressure point across all of Chinese medicine, and for tech neck it serves as a powerful adjunct that amplifies the effects of the neck-specific points.
Large Intestine 4 is the command point for the face and head â it powerfully moves qi and blood in the entire upper body, which makes it essential for any condition involving the head, neck, face, or shoulders. For tech neck, it releases the full-body muscle tension that accompanies the postural pattern, improves circulation to the head and face, and has strong analgesic effects that reduce pain levels.
Research consistently demonstrates that Large Intestine 4 modulates pain perception, reduces inflammation, and influences autonomic nervous system balance. For the headaches and facial tension that accompany tech neck, this point is often what takes the pain from moderate to minimal after the neck points have done their primary work.
Press deeply into the muscle for 1 to 2 minutes on each hand. The pressure should produce a strong ache that radiates into the hand. Pregnant women should avoid this point. This is a point you can press throughout the day whenever you notice tension building.
The 5-Minute Tech Neck Release Sequence
Here is the sequence I use personally and recommend to anyone dealing with screen-related neck and shoulder pain. It takes about 5 minutes and can be done at your desk, in your car, or anywhere you have 5 minutes.
Start with Gallbladder 20 bilaterally. Press both points simultaneously with your thumbs, angling slightly upward toward the center of the skull. Hold for 60 to 90 seconds while breathing slowly. This releases the deepest tension at the skull base and starts the cascade of relaxation.
Move to Bladder 10 bilaterally. Shift your thumbs slightly lower and more laterally, pressing into the thick neck muscles. Hold for 60 seconds. The combination of Gallbladder 20 and Bladder 10 releases the entire suboccipital and upper cervical region.
Press Gallbladder 21 on each side. Use your opposite hand to squeeze and press the top of each shoulder for 30 to 60 seconds per side. You should feel the shoulders physically drop as the upper trapezius releases.
Finish with Large Intestine 4 on each hand. Press for 30 to 60 seconds per hand. This clears any remaining tension from the upper body and addresses headache symptoms.
If you have more time, add Small Intestine 3 and Governor Vessel 16 to the sequence. The full 6-point protocol takes about 8 to 10 minutes and addresses both the symptoms and the structural patterns.
Building a Prevention Protocol
Reactive treatment â pressing points only when the pain is already bad â helps, but a daily prevention protocol actually retrains your muscular and nervous system patterns over time.
Morning protocol: Press Gallbladder 20, Bladder 10, and Gallbladder 21 for 2 minutes each, bilaterally, before starting your work day. This takes about 12 minutes and sets a baseline of relaxation in the neck and shoulder muscles before you begin screen time. People who do this consistently report that their tech neck symptoms take significantly longer to develop during the day.
Hourly micro-breaks: Every hour during screen work, press Gallbladder 20 for 30 seconds while slowly rotating your neck through its range of motion. This prevents the stagnation from building up to the point where it causes pain. The total time investment is about 30 seconds per hour.
Acupressure mat sessions amplify this protocol dramatically. Lying on your Pranamat for 15 to 20 minutes daily, with special attention to positioning the mat so the spikes contact the back of the neck and upper back, stimulates dozens of acupressure points simultaneously across the entire affected region. I have been using my Pranamat daily since 2017, and for tech neck specifically, the mat creates a level of posterior chain release that no amount of individual point pressing can replicate. The broad stimulation retrains the muscles of the upper back and neck toward relaxation rather than chronic contraction, and the improved blood flow accelerates tissue recovery between screen sessions. For more on the benefits of acupressure mats, check our detailed guide.
Evening protocol: Press all six points in the full sequence before bed. This clears the day’s accumulated tension and prevents you from sleeping with chronically contracted neck muscles, which is how morning stiffness develops.
What the Research Says
The research on acupressure for neck pain is robust and clinically significant. A systematic review in the Journal of Pain Research found that acupressure significantly reduces neck pain intensity and improves cervical range of motion compared to control conditions. The effects were consistent across multiple study designs and populations.
Studies specifically examining the points used in this protocol â particularly Gallbladder 20 and Gallbladder 21 â have demonstrated reductions in cervical muscle tension, improvements in blood flow to the head and neck, and decreased frequency of tension-type headaches. These effects occur within minutes of stimulation, which aligns with the clinical experience of using these points for acute tech neck pain.
Research on acupressure mat therapy has shown additional benefits for chronic neck and back pain. A study published in Evidence-Based Complementary and Alternative Medicine found that participants using acupressure mats experienced significant reductions in neck and shoulder pain, improved sleep quality, and decreased use of pain medication over a 6-week period.
The mechanism appears to involve both local effects â increased blood flow, muscle relaxation, and trigger point deactivation â and systemic effects including vagal nerve activation, endorphin release, and autonomic nervous system rebalancing. This dual mechanism explains why acupressure for tech neck often produces relief that exceeds what you would expect from simple muscle massage.
Common Mistakes to Avoid
Pressing the neck points too aggressively. The muscles of the neck are smaller and more sensitive than back muscles. Use firm pressure but not maximum force, especially when starting out. Pressing too hard can actually cause the muscles to guard and tighten further, making the problem worse.
Only treating the neck when the problem includes the upper back and shoulders. Tech neck is a whole-body postural pattern, not just a neck problem. The upper back pain between the shoulder blades, the rounded shoulders, and the tightened pectorals all contribute to the cervical symptoms. Including Gallbladder 21 and Small Intestine 3 addresses the broader pattern.
Ignoring the structural component. Acupressure relieves the muscular tension and pain of tech neck effectively, but if you return to the same forward head posture immediately after, the tension will rebuild quickly. Combine the acupressure protocol with ergonomic changes â monitor at eye level, phone held up rather than looked down at, and regular postural breaks.
Not being consistent with the prevention protocol. The acute relief sequence works well for immediate pain, but the real transformation happens with consistent daily practice over weeks. The morning protocol and hourly micro-breaks gradually retrain your nervous system so that the muscles default to a more relaxed state rather than chronic contraction.
Ergonomic Changes That Support the Acupressure Protocol
Acupressure addresses the symptoms and muscular patterns of tech neck, but reducing the postural stress that causes it in the first place makes the acupressure significantly more effective.
Position your monitor so the top of the screen is at eye level. This prevents the forward head tilt that initiates the tech neck cascade. For laptops, use a separate keyboard and a laptop stand or stack of books to raise the screen.
Hold your phone at eye level rather than looking down at it. This single change reduces the effective weight on your cervical spine from 60 pounds back to 10 to 12 pounds. It feels awkward at first but becomes natural within a few days.
Take screen breaks every 30 to 60 minutes. Stand, look at something far away, and roll your shoulders. Combine this with the Gallbladder 20 micro-press described above.
Strengthen the deep neck flexors and the muscles between your shoulder blades. These muscles are weakened and lengthened by tech neck posture, and strengthening them helps maintain the corrected posture between acupressure sessions. Simple chin tucks and wall angels performed daily create significant improvement over 4 to 6 weeks.
When to See a Professional
If your neck pain is accompanied by numbness, tingling, or weakness in your arms or hands, see a healthcare provider to rule out nerve compression that may require medical treatment. Similarly, if neck pain follows a trauma or is accompanied by severe headaches that are different from your usual pattern, professional evaluation is important.
A licensed acupuncturist can provide needle acupuncture that stimulates these same points more deeply and can customize treatment based on your specific pattern. Some people have tech neck driven primarily by Gallbladder channel stagnation, others by Bladder channel tension, and others by a combination with stress-related holding patterns. A practitioner can identify your pattern and optimize the treatment accordingly.
Physical therapists and chiropractors who specialize in postural correction can also complement the acupressure approach by addressing structural alignment and muscular imbalances that self-treatment cannot fully resolve.
The Bottom Line
Tech neck is a modern epidemic driven by our relationship with screens, and acupressure provides a practical, evidence-supported approach to managing it that you can use anywhere, anytime, without equipment. The key points â Gallbladder 20, Bladder 10, Gallbladder 21, Small Intestine 3, Governor Vessel 16, and Large Intestine 4 â target the muscular tension, nerve compression, and qi stagnation patterns that drive tech neck from multiple angles simultaneously.
The 5-minute release sequence provides immediate relief during or after screen sessions. A consistent daily prevention protocol retrains your muscular and nervous system patterns over weeks, reducing the severity and frequency of symptoms. Combined with regular Pranamat sessions for broad posterior chain stimulation and basic ergonomic adjustments, these pressure points provide a comprehensive approach to managing tech neck that puts real tools in your own hands.
Frequently Asked Questions
How quickly does acupressure relieve tech neck pain?
Most people experience noticeable relief within 3 to 5 minutes of pressing the key points, particularly Gallbladder 20 and Bladder 10. The relief is immediate but temporary if you return to the same posture without making ergonomic changes. With consistent daily practice over 2 to 4 weeks, the baseline tension level decreases and pain takes significantly longer to develop during screen sessions.
Can I do acupressure for tech neck at my desk?
Yes, and this is one of the biggest advantages of acupressure for this condition. All six points in this protocol can be pressed discreetly at your desk without anyone noticing. Small Intestine 3 can be pressed by making a fist against the edge of your desk. Large Intestine 4 and Gallbladder 20 can be pressed with one hand while appearing to rest your chin or rub your neck.
How often should I press these points during a work day?
For prevention, press Gallbladder 20 for 30 seconds every hour during screen time. This prevents stagnation from building up. If pain is already developing, do the full 5-minute sequence. For the daily prevention protocol, morning and evening sessions of 10 to 12 minutes each produce the best long-term results.
Is tech neck reversible with acupressure?
Acupressure effectively reverses the muscular tension component of tech neck and can significantly reduce pain and stiffness. The structural changes â altered spinal curvature and postural habits â require combining acupressure with ergonomic corrections and strengthening exercises. Together, these approaches can substantially reverse tech neck for most people within 4 to 8 weeks of consistent practice.
Should I use an acupressure mat for tech neck?
An acupressure mat is one of the most effective tools for tech neck because it stimulates dozens of pressure points across the entire upper back and neck region simultaneously. Position the mat so the spikes contact the area between your shoulder blades and up through the neck. A 15 to 20 minute daily session creates broad muscular relaxation and blood flow improvements that complement the targeted point work.
What is the difference between tech neck and a stiff neck?
Tech neck is a specific postural pattern caused by prolonged forward head position during screen use. A stiff neck can result from many causes including sleeping position, drafts, or acute injury. Tech neck tends to involve the suboccipital muscles, upper trapezius, and levator scapulae specifically, and it develops gradually rather than appearing suddenly. The acupressure protocol in this guide is specifically designed for the tech neck pattern but works well for general neck stiffness too.
Related Reading
- Neck and Shoulder Pain Pressure Points
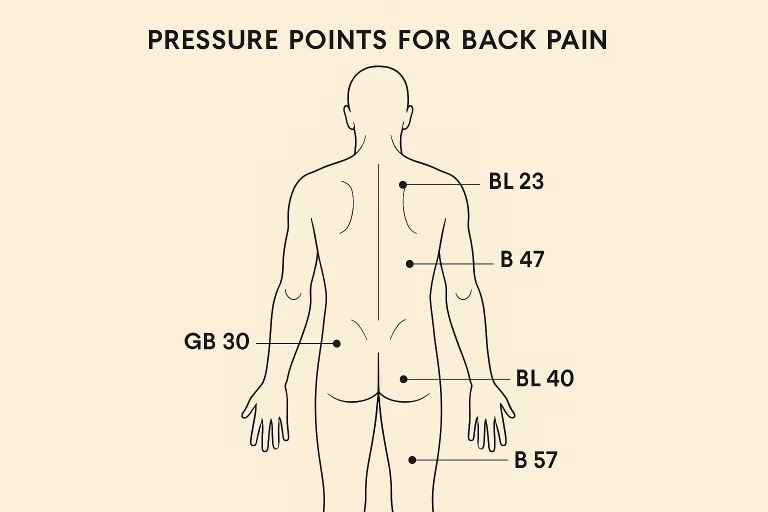
- Pressure Points for Back Pain
- Acupressure Points for Frozen Shoulder
- Pressure Points for Stress
- Stiff Neck Natural Remedies and Prevention
- Acupressure Mat Benefits
Author

Free Mobile App
Find Pressure Points on the Go
Interactive 3D body map with 100+ acupressure points, step-by-step guides, and personalized routines.
Download Free App →